Setting up the right grow light system is crucial for the healthy growth of indoor plants and seedlings during the growing season. Different types of grow lights, such as LED, HPS, CMH, and CFL, can have other effects on the plants’ development.
First, to set up the grow lights, determine your plants’ supplemental light needs and select the appropriate type of grow light based on their requirements. Calculate the required light intensity and adjust the distance between the lights and plants indoors accordingly.
Set up a light timer to establish a consistent light schedule and hang the lights at the recommended height for even distribution. Ensure proper ventilation and cooling to maintain an optimal temperature range. Regularly monitor the system for maintenance, observe the plants for signs of stress, and make necessary adjustments.
Potential problems of an incorrect setup include insufficient light intensity, overexposure to light, inconsistent light schedule, incorrect light spectrum, and improper ventilation. Signs of a correctly set up grow light system include balanced growth, adequate flowering or fruiting, minimal signs of stress, and consistent growth.
Tips for setting up a grow light system include researching plant-specific lighting needs, investing in high-quality lights, keeping records, monitoring and adjusting adequate lighting conditions, and seeking advice from experienced growers.
Remember, a properly set up grow light system can significantly enhance the growth of plants and the productivity of seedlings.
Table of Contents
- 1. Determine the type and size of grow light you need
- 2. Select types of grow light settings
- 3. Choose a location for your grow light
- 4. Suspend the grow light
- 5. Connect the grow light to a power source
- 6. Set the grow light timer on your grow light
- 7. Monitor the light output of your grow light and adjust
- What tips do growers need to know for setting up grow lights?
1. Determine the type and size of grow light you need
When setting up a grow light system, it’s essential to determine the right type and size of light based on two key factors: the size of the growing space and the type of plant.
a. Size of the Growing Space
The size of your growing space, whether a grow tent, a closet, a spare room, or even a space with strict plant count limits for medical growers, plays a significant role in selecting the appropriate grow light.
Different space sizes require different standards, such as wattage per square foot, to ensure optimal growth.
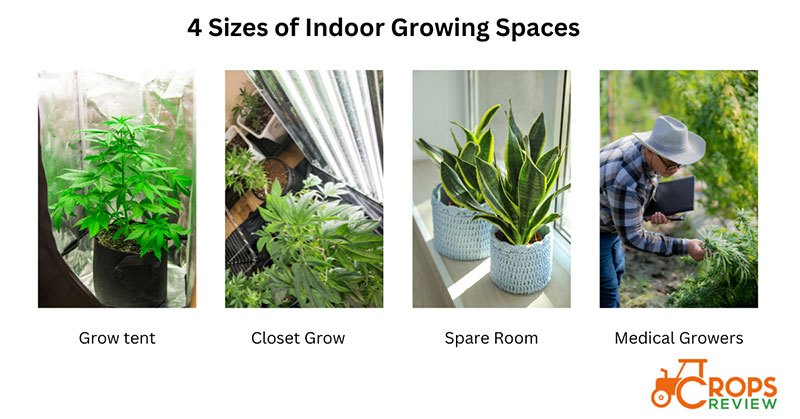
Grow Tent
For a 2×2 grow tent (4 square feet), a recommended wattage range is around 100-200 watts, which translates to 25-50 watts per square foot.
In a 4×4 grow tent (16 square feet), aiming for 30-40 watts per square foot, you would ideally need a total wattage of 480-640 watts.
For larger grow tents, such as an 8×8 tent (64 square feet), a higher wattage range of 40-50 watts per square foot can be used, resulting in a total wattage of 2,560-3,200 watts.
Closet Grow
In a small closet grow, where the available space is around 2×4 feet (8 square feet), a recommended wattage would be approximately 200-400 watts, equivalent to 25-50 watts per square foot.
Spare Room
If you have a spare room for your indoor garden, the wattage requirement will depend on the overall size of the room and the number of plants. Calculate the room’s total square footage and apply the recommended wattage per square foot mentioned earlier.
Medical Growers with Plant Count Limits
Medical growers with strict plant count limits may need to maximize the yield from a limited number of plants. In such cases, the wattage per plant becomes crucial. For example, if you have a limit of 4 plants in a 4×4 grow tent, you could aim for 120-160 watts per plant, resulting in a total wattage of 480-640 watts.
b. Type of Plant and Growing Stage
Different plants have varying lighting requirements, and selecting the right grow light for each growth stage is crucial. Here are some general principles to keep in mind.

Cannabis: During the seedling and vegetative stages, cannabis benefits from light in the blue spectrum (400-500nm) with a color temperature of 6500K to 7500K. Blue light encourages strong stem and foliage development.
Mushrooms: Mushrooms, like the Psilocybe cubensis, require low-intensity, warm white light (2700K) when they enter the fruiting stage. This stimulates mushroom formation and growth.
For seedlings and vegetative stage:
Fluorescent Light fixtures (T5) emit cool spectrum white( 6500K to 7500K) or blue range light (400 and 490 nm) for healthy leaf and stem development.
For flowering and blooming stage:
High-Pressure Sodium (HPS) Lights provide a warm, red-orange spectrum (lower than 3000K) to stimulate flower development and fruit production.
Light Emitting Diode (LED) Lights offer customizable spectrums and can provide specific wavelengths for robust flower formation. The LED grow lights are available in various color temperatures such as Cool White (5000K-7500K), Neutral White (4000K-5000K), Warm White (2700K-3500K), and Full Spectrum (2000K-7000K).
Ceramic Metal Halide (CMH) Lights emit a broad-spectrum light (3000K to 4200K) similar to natural sunlight for overall plant health.
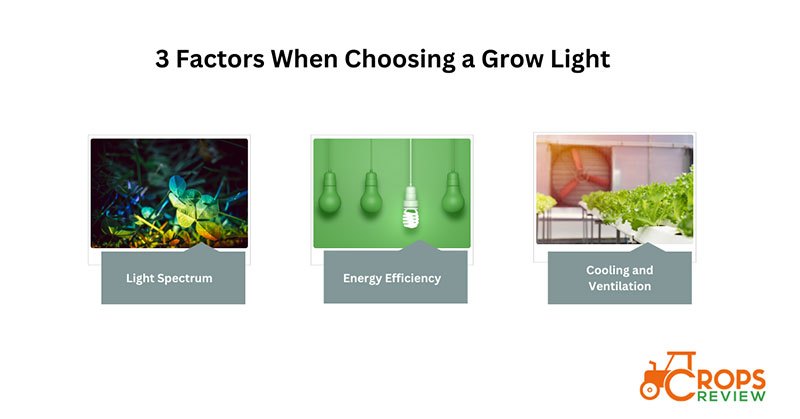
Considerations when choosing a grow light:
- Light Spectrum: Ensure the indoor grow light system provides the appropriate spectrum for your growing plants. Full-spectrum lights are ideal for orchids and hibiscus as they mimic natural sunlight.
- Energy Efficiency: Look for energy-efficient options, such as LED or CMH (ceramic metal halide) grow lights, which consume less electricity while providing high-quality light.
- Cooling and Ventilation: Consider the heat generated by the grow lights and ensure proper ventilation and cooling measures to maintain an optimal temperature range for plant growth.
Fixture vs. Bulbs:
Grow lights can come in two main forms: light fixtures and bulbs.
Grow light fixtures typically contain multiple bulbs and are more suitable for larger spaces, providing broader coverage. Bulbs, on the other hand, are individual light sources that can be used in smaller setups or to supplement existing lighting.
We recommend the double-ended HID bulb if you want to choose the safest option for grow lights. Double-ended HID bulbs are gaining popularity as the standard for HID grow lights due to their high intensity, large yields, and premium performance.
2. Select types of grow light settings
Four common indoor grow light system setups can be utilized for different purposes. These include high and low intensity setup, single light setup, grow low and limited plants for growing setup.
- High and Low Intensity Setup (Mix type): This setup combines different types of grow lights to provide both high-intensity lights for flowering and low-intensity light for vegetative growth. High Pressure Sodium (HPS) or Ceramic Metal Halide (CMH) lights are used for blooming stages, while Fluorescent lights or LED lights are employed for early growth stages. This setup offers flexibility and optimal light spectra for various growth phases. However, it requires careful positioning and balancing of light sources to ensure even coverage and prevent shading.
- Single Light Setup: This type of setup involves using a single type of lamp, usually a full spectrum LED. Full-spectrum LEDs provide a balanced light spectrum covering vegetative and flowering stages. They are energy-efficient, emit less heat, and can easily adjust for different plant requirements. This setup is simple and cost-effective, making it suitable for small-scale or home growers. A practical example would be using a 300W full spectrum LED grow light for a small indoor vegetable plants garden that measures in 2′ x 2′ (or 4 square feet).
- Grow Low: The Grow Low setup is designed for growing crops with limited vertical space, where height control is crucial without sacrificing the quality of the growing plant. This best grow light setup typically utilizes compact and low-profile LED panels or strip lights that emit blue light (400-500 nm) suitable for plant growth. The advantage of this setup is its ability to maintain shorter plant stature while promoting healthy plant growth. It is often used in grow tents, cabinets, or other confined spaces. A practical example could be setting up a low-profile LED strip light system on a kitchen countertop for growing herbs.
- Limited Plants for Growing: This setup is employed when there are restrictions on the number of plants due to legal limitations or space constraints. For example, some regions have laws limiting the number of cannabis plants that can be grown. In such cases, growers may opt for a small-scale setup with a few high-performance lights, such as LED grow lights with adjustable spectrums and intensity levels, to maximize yield in a limited plant count scenario. This is the best cheap grow light setup, as users can often choose the number and type of lights they use.
Based on these four choices, the best type of grow light setup would be a Mix Type due to its versatile light intensity and the use of HPS or CMH lamps.
3. Choose a location for your grow light
When setting up grow lights, it is important to consider the uneven light intensity that artificial light can deliver compared to natural light. One effective solution to this problem is choosing the right indoor grow light system setup location.
Typically, the indoor grow light system, such as a grow tent, should be placed in the center of the growing area. This ensures an even distribution of light throughout the space. However, when tall plants are present, it may be necessary to adjust the placement of the grow lights. In these cases, the lights can be positioned closer to the plants to provide adequate light to those below.
Generally, the lights are installed on the ceiling to achieve an even coverage. However, specific factors such as plant height, grow space dimensions, and light intensity requirements should be considered.
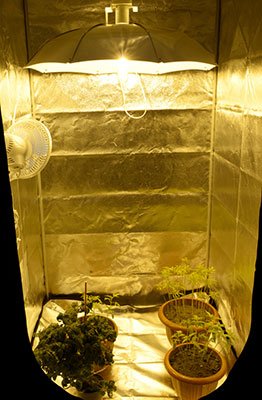
4. Suspend the grow light
When setting up grow light systems, it is crucial to consider the right height to hang the lights. The optimum height depends on various factors, such as the grow light (LED, HPS, MH, CMH), the power output, and the growth stage of the plants.
Determining the Right Height: For HID grow lights like HPS and MH, it is generally recommended to keep them at least 12 inches (30cm) away from the plants to prevent heat stress and light burn. LED grow lights can typically be hung between 16 and 24 inches above the plants, but specific recommendations may vary depending on the manufacturer and light intensity.
Adjusting for Plant Growth: As the plants grow taller, it is crucial to adjust the height of the grow lights accordingly. Maintaining an appropriate distance ensures that the plants receive sufficient light without getting too close to the source, which can cause damage. For example, LED grow lights can be hung around 20-30 inches above the plants during the seedling stage. As the plants enter the vegetative growth stage, the lights can be lowered to about 18 inches for improved production.
Consider the Light Spread: When hanging grow lights, it is important to consider the coverage area and light spread. Certain grow lights, such as LED panels or multiple bulbs/strips, may require different hanging configurations to ensure even light distribution across the entire growing space.
Choose the Right Suspension System: The method of hanging grow lights will depend on the setup. For smaller setups, simple hooks or adjustable hangers can be used to suspend the lights from the ceiling. In larger setups, a frame or a grow light stand rack system may be necessary to hang multiple lights or cover multiple shelves.
When hanging grow lights, it is important to follow a step-by-step process to ensure proper installation.
Step 1: Determine the Location
Find the center of the grow tent or growing area where the lights will be placed.
Step 2: Measure the Height
Determine the height at which the lights need to be hung based on the specific requirements of the plants and the type of grow light being used.
Step 3: Prepare the Fixture
Attach it to the tent support poles or ceiling hooks if using a rope ratchet or cable. Ensure LED lights are securely fastened to the light fixture or hanging light systems.
Step 4: Hang the Lights
Hoop the hanging strings or ropes over the beam or support structure. Attach the rope ratchet or cable to the tent support poles or ceiling hooks. Adjust the height of the lights as needed to achieve the desired coverage and intensity.
Step 5: Additional Steps for HPS/MH/CMH Grow Lights with Grow Light Reflectors
Additional steps may be required if HPS, MH, or CMH grow lights with reflectors are used. Position the grow light reflector properly to reflect and direct the light towards the plants. Adjust the angle and position of the reflector to optimize light distribution.
5. Connect the grow light to a power source
To connect an LED grow light to a power source, follow 6 steps below:
- Locate the power cord provided with the LED grow light.
- Ensure the power source you connect to can handle the grow light’s electrical load. Consider the wattage and voltage requirements of the grow light and compare them to the capacity of the power source. It is important not to overload the power source. Calculate the combined wattage, distribute the lights across different circuits if possible, and consult an electrician to ensure safety and avoid overloading the power source.
- Inspect the power cord for any damage or frayed wires. Please do not use a damaged cord, which can pose a safety hazard.
- Plug one end of the power cord into the appropriate port on the LED grow light fixture.
- Plug the other end of the power cord into a grounded electrical outlet or a surge-protected power strip.
- Verify that the connection is secure and the power indicator on the LED grow light is illuminated.
6. Set the grow light timer on your grow light
The grow light timer plays a vital role in an LED grow light system by regulating the duration and intensity of light exposure for plants, ensuring they receive the optimal amount of light based on their specific needs, and saving electricity costs.
The grow light timer allows users to program the start and end times for the light cycle, controlling when the grow lights turn on and off.
Additionally, some timers offer options to adjust light intensity levels, enabling customization based on the growth stage of the plants.
To program the timer for your LED grow light, follow these 6 steps:
- Familiarize yourself with the timer’s instructions.
- Set the current time on the timer.
- Determine the desired light schedule for your plants.
- Enter the start and end times for the light cycle.
- Adjust the light intensity if applicable.
- Test the timer to ensure it functions correctly.
7. Monitor the light output of your grow light and adjust
To ensure optimal growth and prevent damage to your plants, it is important to regularly monitor the light output of your LED grow light and make adjustments as needed. One crucial aspect is the distance between the grow light and your plants.
As plants grow, their light requirements change and the light’s intensity can significantly impact their development. If you notice signs of burning or stress on your plants, such as wilting, yellowing, or stunted growth, it may indicate that the light intensity is too high or the light is too close to the plants. In such cases, it is necessary to adjust the distance between the grow light and the plants.
When using a grow light, adjust the distance between the light and plants based on their growth stage. During the seedling stage, keep the light 24-36 inches away for gentle lighting of the healthy seedlings. As plants mature, decrease the distance to 12-24 inches. If plants show signs of stress or burning, move the light further away to prevent damage.
The following table illustrates the wattage and the appropriate height required by the 4 stages of plant growth.
| Stage of Plant | Wattage of Lights | Appropriate Height |
| Seedling | 50-100 watts | 24-36 inches |
| Vegetative | 100-300 watts | 12-24 inches |
| Flowering | 300-600 watts | 12-24 inches |
| Fruit/Bloom | 600+ watts | 12-24 inches |
What tips do growers need to know for setting up grow lights?
When setting up grow lights, growers should consider these 4 tips:
- Choose the right type of light: Full-spectrum LED panels are highly recommended because they provide a balanced light spectrum that closely mimics natural sunlight. Look for lights with an actual wattage of 300 to 600 watts, as this range is suitable for indoor gardens and organic gardening systems.
- Determine the appropriate mounting height: The distance between the light fixture and the plants is crucial for proper light intensity and coverage. For healthy seedlings and young plants, keep the lights at a height of 6-12 inches to prevent excessive heat and light stress. As the plants grow taller, you can gradually increase the height to maintain the optimal light distance. Proper light positioning ensures even distribution and coverage across the entire plant canopy. Maintain a 24-36 inches distance between the light source and the top of the plants. This distance helps minimize the risk of burning or light bleaching while providing adequate light intensity.
- Follow the recommended light cycle: Most plants require a specific light cycle for vegetative growth and flowering stages. The standard light cycle for most plants is 18 hours of light followed by 6 hours of darkness during the vegetative stage and a switch to 12 hours of light and 12 hours of darkness for flowering. However, it’s essential to research the specific light requirements of the plants you are growing, as some may have slightly different needs.
- Consider your specific plant needs: Different plants have different light requirements. Some plants, like the Peruvian Apple cactus, thrive with higher light intensities, while others, like ZZ plants (Zamioculcas zamiifolia) prefer lower light levels. Before setting up your grow lights, research the specific light needs of your plant species.
How do you measure grow light with a PAR meter?
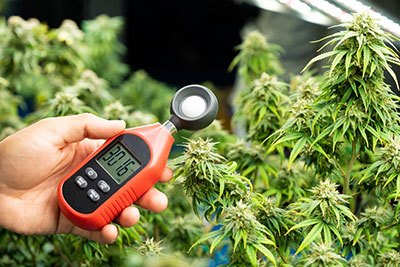
To measure grow light with a PAR meter, first, turn on the grow lights and let them stabilize for a few minutes. Hold the PAR meter at the height of the plants, pointing the sensor towards the light source. Take measurements over the entire footprint of the grow light and calculate an average value.
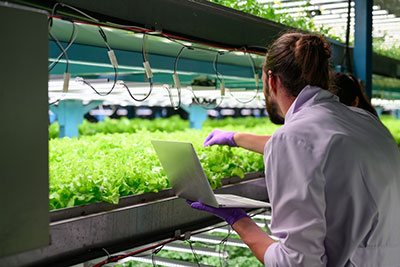
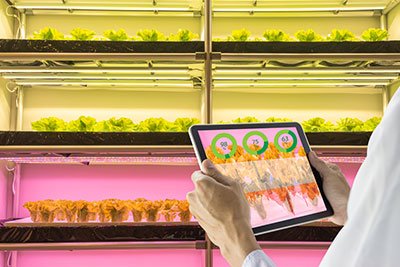
How do you automate grow lights with controllers, movers, and meters?
Automating grow lights with controllers, movers, and meters requires installing a light controller to program lighting schedules and adjust intensity levels.
Program the controller to set light schedules, spectrum and integrate environmental meters to maintain ideal growing conditions. Configure alerts, monitor conditions, and adjust settings as needed.
Consider remote control, emergency shutdown procedures, maintenance, and data analysis for a well-rounded automation system that can improve plant growth and minimize energy consumption.