Carbon filters play a vital role in the ventilation system of a grow tent or room by effectively eliminating unwanted odors and ensuring a healthy and odor-free environment for plants. Carbon filters are necessary for indoor plant cultivation with limited ventilation options. However, odor dispersion is less critical in isolated rural areas or well-ventilated grow rooms, and carbon filters are unnecessary.
Carbon filters in grow tents utilize activated carbon to adsorb and neutralize odor molecules from the airflow, resulting in odor-free air within the enclosed space.
Setting up a carbon filter involves integrating it into the existing ducting system of the ventilation setup. Using and maintaining it effectively requires the fan to draw air through the filter, capturing odors in the activated carbon.
Regular maintenance includes inspecting and cleaning the filter to ensure its continued efficiency.
Over time, the activated carbon within the filter becomes saturated with the odorous compounds it has adsorbed, making it less effective in neutralizing new odors. Once the carbon filter reaches the saturation point, usually after 12-24 months, it will need replacement.
Table of Contents
- What are carbon filters?
- What are the benefits of carbon filters for indoor growing?
- How do you set up a carbon filter in a grow tent?
- What affects the effectiveness of carbon filters in indoor growing environments?
- Does it need to be turned on your carbon filter all the time?
- How long do carbon filters last?
- When should you change a carbon filter?
- How to build your own carbon filter?
- How do you choose the best carbon filter for your grow tent?
- What are the safety factors for carbon filters?
- How do you maintain your carbon filter?
What are carbon filters?

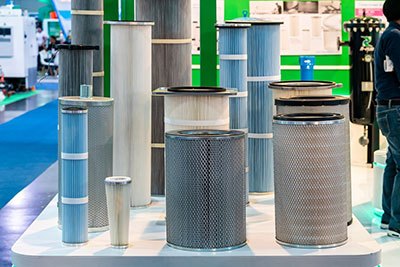
Carbon filters are devices that remove impurities and odors from the air or water. They comprise a housing, an activated carbon bed, a filter media layer, and inlet and outlet ports.
- Housing: The housing is the outer casing or container of the carbon filter. It is designed to hold the other components securely and provide protection.
- Activated Carbon Bed: The activated carbon bed is the core component of the filter. It contains the activated carbon material, which acts as the adsorbent for the contaminants.
- Filter Media: The filter media is a layer that surrounds the activated carbon bed. It helps to prevent any carbon particles from escaping while allowing fresh air or water to pass through.
- Inlet and Outlet Ports: These ports are openings in the housing that allow the entry and exit of air or water to be filtered. The inlet port is where the contaminated air or water enters the filter, while the outlet port is where the clean, purified air or water exits.
How do carbon filters work?
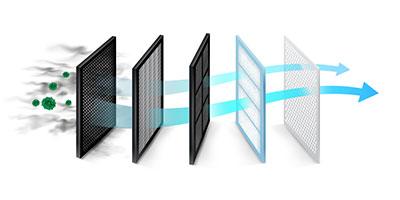
Carbon filters work through a process called adsorption, which is the adhesion of molecules to the surface of a material. The critical component of a carbon filter is the activated carbon. The activated carbon has a network of microscopic pores that can trap and hold various contaminants.
When air or water passes through a carbon filter, the contaminants in the medium come into contact with the activated carbon. The contaminants are attracted to the surface of the carbon due to van der Waals forces and other molecular interactions. The porous structure of the carbon provides numerous sites for this adsorption.
The surface area of activated carbon has an affinity for organic compounds, such as volatile organic compounds (VOCs), odors, and chemicals. As the contaminants come into contact with the carbon, they adhere to its surface area, effectively removing them from the air or water. This process significantly reduces impurities’ concentration and improves the filtered medium’s quality.
What is activated carbon?
Activated carbon, also known as activated charcoal, is a highly porous form of carbon processed to increase its surface area and adsorption capacity. It is commonly used in filters and purification systems to remove air and water impurities, odors, and contaminants.
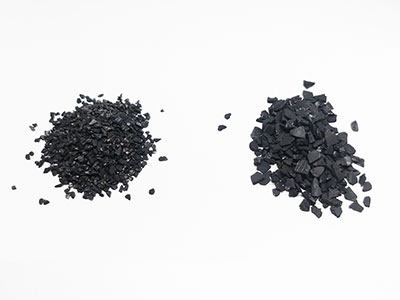
There are two main types of carbon used in activated charcoal filters:
Bituminous Coal-based Carbon: This type of carbon is derived from bituminous coal, a type of coal that is formed from sedimentary rocks. Bituminous coal-based carbon has a high adsorption capacity and effectively removes many contaminants, including volatile organic compounds (VOCs), chemicals, and odors.
Coconut Shell-based Carbon: This type of carbon is made from coconut shells, which are a renewable and sustainable source. Coconut shell-based carbon has excellent adsorption properties and is commonly used in water filtration systems. It is particularly effective in removing chlorine, taste, and odor compounds.
What are carbon filters used for?
Carbon filters are widely used within horticulture, for smoking neighbors, removing kitchen and pet odors, and industrial processing facilities.
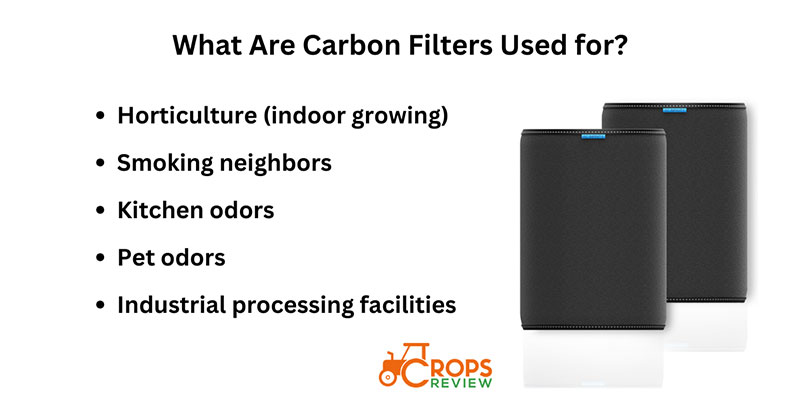
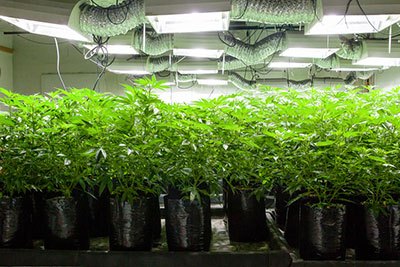
Horticulture (Indoor Growing): Carbon filters control odors in indoor gardening by capturing the strong-smelling compounds released by plants. A carbon filter is typically placed within the indoor garden’s ventilation system or airflow path. As air passes through the filter, the activated carbon captures and adsorbs the VOC molecules responsible for the odors. The porous structure of the activated carbon allows it to trap these molecules effectively. This keeps the surroundings fresh and odor-free.
Smoking Neighbors: Carbon filters provide relief from second-hand smoke. A carbon filter is typically incorporated into an air ventilation system or placed strategically to intercept the smoke-filled air. As the air passes through the filter, the activated carbon absorbs the smoke particles and odor molecules, effectively trapping them.
Kitchen Odors: Carbon filters in the kitchen effectively trap and neutralize cooking smells, ensuring a fresh and clean atmosphere. A carbon filter is typically integrated into the exhaust system or placed in range hoods. As the air containing cooking odors is drawn into the filter, the activated carbon acts as a powerful adsorbent.
Pet Odors: Carbon filters address pet odors by capturing and neutralizing the volatile compounds responsible for the odor, enhancing indoor air quality. By incorporating carbon filters in areas affected by pet odors, such as near litter boxes or pet living spaces, the filters can help freshen the air and reduce unpleasant odors.
Industrial Processing Facilities: Carbon filters remove noxious odors and contaminants from the air in industrial facilities. Industrial processing facilities often produce airborne pollutants and volatile organic compounds (VOCs) that can harm human health and the environment. Carbon filters, specifically activated carbon filters, effectively mitigate these concerns by capturing the pollutants.
What are the benefits of carbon filters for indoor growing?

Indoor growing has become increasingly popular among enthusiasts and professionals alike. Managing odors, ensuring proper ventilation, eliminating pathogens, and addressing ozone emissions are all benefits of carbon filter a thriving indoor garden.
- Manages odor: Carbon filters are highly effective in controlling and eliminating odors in indoor growing environments. They use activated carbon to adsorb and trap the odor-causing molecules, ensuring a fresh and odor-free atmosphere.
- Aids in ventilation system: Carbon filters are an integral part of the ventilation system in indoor growing setups such as grow rooms. By removing odors and contaminants from the air, carbon filters help maintain proper air circulation and prevent stale and stagnant air.
- Eliminates airborne pathogens: Indoor growing environments can be susceptible to the growth of airborne pathogens such as mold, mildew, and bacteria. Carbon filters play a vital role in eliminating these pathogens by capturing and removing the spores and microorganisms from the air.
- Ozone absorption: Some indoor growing setups may utilize ozone generators for various purposes, such as sterilization or odor control. However, ozone can be harmful when inhaled in high concentrations. Carbon filters can absorb and neutralize ozone, preventing its release into the surrounding environment and ensuring the safety of growers and plants.
Do you need a carbon filter for a grow tent?
Yes, you do need a carbon filter for your grow room! Indoor growing has become increasingly popular, and when it comes to grow tents, the necessity of using a carbon filter is a topic of discussion among growers.
Carbon filters offer numerous benefits for a successful indoor growing environment. While fans can help with air circulation, they cannot effectively remove odors and airborne contaminants like a carbon filter does.
Carbon filters are specifically designed to adsorb and trap odor-causing molecules, providing better odor control in a grow tent. They do not have any direct harmful effects on plant growth. However, it’s important to ensure proper ventilation and airflow to provide plants with an adequate supply of fresh air and CO2.
Regardless of the size of the grow tent, odors and airborne pollutants can accumulate and impact the overall environment. Using a carbon filter helps maintain a more pleasant and odor-free atmosphere, promoting healthier plant growth.
Should I use a carbon filter in my grow room?
Yes, using a carbon filter in a grow room is best. There are several factors to consider, such as room size and ventilation.
Compared to a grow tent, a carbon filter may be more necessary in a grow room due to its larger size and potential for stronger odors. In a larger space, such as a grow room, a higher volume of air needs to be filtered, making a carbon filter necessary for effective odor control and maintaining a clean environment.
However, there may be instances where using a carbon filter is unnecessary, such as if odor control is not a concern or if the grow room is well-ventilated with sufficient airflow.
How effective are carbon filters for weed?
Carbon filters are highly effective in removing up to 99% of weed cultivation’s odors, helping maintain a discreet and odor-free environment.
The study “Review on Odor and VOCs Emission in Cannabis Production Facilities” by Wang (2018) underscores the significance of effectively managing odors and volatile organic compounds (VOCs) in cannabis cultivation facilities.
Cannabis plants emit potent odors, making proper odor control crucial for regulatory compliance and community relations. The study emphasizes the importance of ventilation systems, activated carbon filters, and various odor mitigation techniques to address these challenges.
Depending on the filter quality, airflow rates, fan sizes, and the initial strength of the odor, a carbon filter in a 10×10 cannabis grow tent can provide odor reduction ranging from 70% to 90%.
How do you set up a carbon filter in a grow tent?
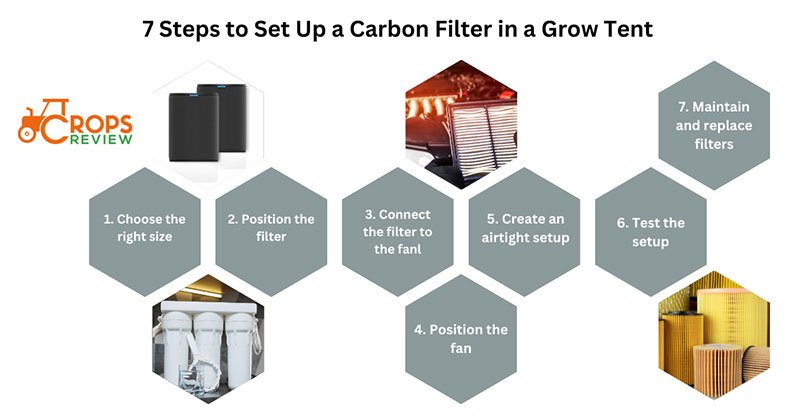
To set up a carbon filter in a grow tent, follow these 7 steps:
- Choose the right size: Select a carbon filter that matches the size of your grow tent and airflow requirements. Consider the CFM (cubic feet per minute) rating of the fan you’ll use with the filter.
- Position the filter: Place the carbon filter at the highest point inside the grow tent, near the top or ceiling. This allows it to capture rising odors effectively.
- Connect the filter to the fan: Attach the intake side of the fan to the carbon filter using ducting. Ensure a secure and airtight connection to prevent any air leaks.
- Position the fan: Set up the exhaust fan outside the grow tent, preferably in a ventilated area to expel the filtered air. Use ducting to connect the outlet side of the fan to a vent or window.
- Create an airtight setup: Seal gaps or openings in the grow tent to maintain a controlled environment. Use duct tape or other materials to ensure no air bypasses the filter.
- Test the setup: Before putting your plants in the grow tent, test the carbon filter system to ensure proper airflow and odor control. Turn on the fan and monitor for any unusual noises or vibrations.
- Maintain and replace filters: Regularly inspect and clean the carbon filter to remove accumulated dust and debris. Replace the filter as recommended by the manufacturer to maintain optimal performance.
How do you set up a carbon filter in an outside grow tent?
When setting up a carbon filter outside a grow tent, consider these 6 steps:
- Choose the appropriate location: Find a suitable spot outside the grow tent where you can mount the carbon filter. It should be easily accessible and well-ventilated.
- Connect the filter to the fan: Use rubber couplers or ducting to attach the intake side of the fan to the carbon filter. Ensure a secure and airtight connection to prevent leaks.
- Position the filter: Mount the carbon filter securely outside the grow tent. It could be attached to a wall, ceiling, or any other stable structure. Ensure it is placed in a way that allows for efficient airflow and odor control.
- Use ducting for ventilation: Connect the outlet side of the fan to a vent, window, or exhaust system using ducting. This will allow the filtered air to be expelled outside the growing area.
- Create an airtight setup: Seal any openings or gaps between the ducting and the filter to prevent air leaks. This will ensure that all air passes through the carbon filter for effective odor removal.
- Test the setup: Before introducing plants into the grow tent, test the carbon filter system to verify proper airflow and odor control. Monitor for any unusual sounds or vibrations from the fan.
What are the methods to set up carbon filters?
There are two common methods for setting up carbon filters in a cannabis grow tent or cultivation space: Scrubbing (continuous filtration) and Exhaust (filtering once when exhausting air).
Here’s an overview of each method, how to implement them, their pros and cons, and the popularity of each approach:
1. Scrubbing (Continuous Filtration)
Method: In the scrubbing method, the carbon filter is placed inside the grow tent, and an exhaust fan is used to draw air through the filter. The filtered air is then returned to the growing space. This method continuously recirculates and cleans the air within the tent.
How to Implement:
- Hang the carbon filter inside the grow tent near the top, typically at the exhaust end.
- Connect the exhaust fan to the filter, ensuring a tight seal to prevent air leaks.
- Set up ducting to channel the filtered air back into the grow tent.
- Provides consistent odor control within the grow tent.
- Maximizes the use of the carbon filter’s lifespan.
- Controls temperature and humidity better by recirculating air.
- It may slightly increase heat within the grow tent due to recirculating warm air.
- Requires more complex ducting and fan systems.
- It can be less energy-efficient compared to the exhaust method.
2. Exhaust (Filtering Once When Exhausting Air)
Method: In the exhaust method, the carbon filter is placed outside the grow tent or in the exhaust system. The exhaust fan draws air from the grow tent and passes it through the filter before expelling it outside the building.
How to Implement:
- Hang the carbon filter either outside the grow tent or in the exhaust system.
- Connect the exhaust fan to the filter for air purification.
- Set up ducting to exhaust the filtered air to the outside.
- It is more straightforward and more accessible to set up.
- It helps keep the grow tent cooler as it doesn’t recirculate warm air.
- Generally, it is more energy-efficient than the scrubbing method.
- Offers odor control primarily at the point of exhaust, which may not fully control odors within the grow tent.
- The carbon filter may need to be replaced more frequently because all air from the tent is filtered before exiting.
Should I set up a carbon filter inside or outside?
You should set up a carbon filter outside your grow room for more effective odor control and improved temperature regulation.
However, setting up the carbon filter inside the growing area has several advantages. It allows for a compact setup, saves space, and minimizes the length of ducting required. This setup can be particularly beneficial if you have limited space or prefer a more discreet installation. However, there are a few drawbacks to consider. Placing the carbon filter inside may reduce the available growing space, and the noise generated by the fan can be more noticeable within the growing area.
On the other hand, setting up the carbon filter outside the grow area also offers certain benefits. This setup allows for efficient airflow and effective odor control without sacrificing valuable growing space. The noise generated by the fan is also less noticeable outside the grow area. However, this setup requires additional space outside the grow area to accommodate the carbon filter and may require longer ducting to connect the filter to the grow tent.
The decision on when to use each setup method depends on your specific circumstances. Setting up the carbon filter outside might be more suitable if you have ample space outside the growing area and prioritize maximum growing space inside. On the other hand, if space is limited or you prefer a more compact and discreet setup, placing the carbon filter inside the growing area could be the better option.
How do you choose the right carbon filter size for a grow tent?
To calculate the appropriate size of a carbon filter for a grow tent, you can use a formula based on the tent’s volume, considering odor control needs. The formula helps determine the recommended carbon filter size.
The following table illustrates the recommended carbon filter size.
| Tent Size | Recommended Carbon Filter Size |
| 2 x 2 | 4-inch carbon filter |
| 3 x 3 | 4-inch carbon filter |
| 4 x 4 | 4-inch or 6-inch carbon filter |
| 5 x 5 | 6-inch or 8-inch carbon filter |
| 4 x 8 | 8-inch carbon filter |
| 5 x 10 | 8-inch or 12-inch carbon filter |
| 8 x 8 | 10-inch carbon filter |
| 10 x 10 | 12-inch carbon filter |
Where do you put a carbon filter in a grow room?
The best place to position the carbon filter in a grow room is at the top of the grow space, near the ceiling. This placement allows for efficient air extraction, as hot air tends to rise. By placing the carbon filter at the highest point, you can effectively capture and filter out any odors before the air is vented out of the grow room.
Ideally, the carbon filter should be connected to an inline fan, which will help pull the air through the filter and exhaust it outside the growing area. The fan should be located after the filter to ensure that the air passes through the filter before being expelled.
When setting up the carbon filter, it should be positioned to allow easy maintenance and replacement access.
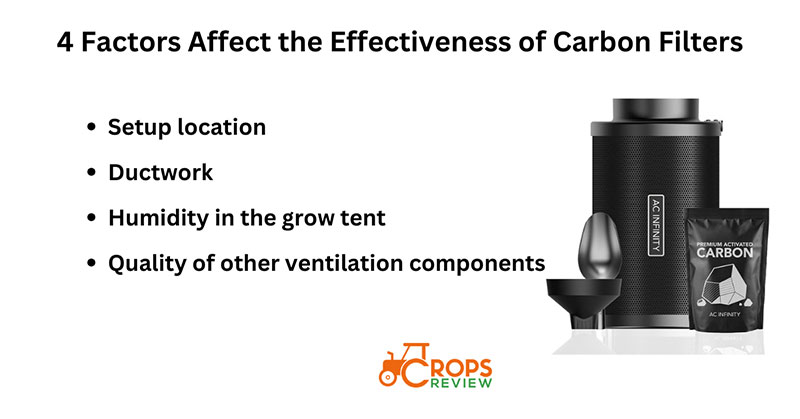
What affects the effectiveness of carbon filters in indoor growing environments?
Factors such as setup location, ductwork, relative humidity, and component quality affect the effectiveness of the carbon filters in indoor growing environments.
Setup location: Indoor setups offer convenience and integration within the existing space, while outdoor setups may require additional weather protection and landscaping considerations. When deciding where to install the carbon filter, it is important to consider factors such as the size of the grow space, the number of plants, and the strength of the odor produced.
Ductwork: The ductwork’s quality and design can significantly impact the effectiveness of carbon filters. Properly sized and sealed ducts ensure air is efficiently pulled through the filter and exhausted from the grow room. Any air leaks or restricted airflow in the ductwork can reduce the efficiency of the carbon filter and allow odors to escape. It is important to use high-quality ducting materials such as aluminum and ensure a tight seal at all connections to maximize the performance of the carbon filter.
Humidity in the grow tent: High humidity levels in the grow tent can affect the performance and lifespan of carbon filters. Excessive moisture can reduce the adsorption capacity of the activated carbon, making it less effective at removing odors. It can also lead to mold or mildew growth on the filter, further impacting its functionality. Maintaining proper humidity levels within the recommended range for your plants and ensuring adequate ventilation to control humidity will help preserve the effectiveness of the carbon filter.
Quality of other ventilation components: The quality of other ventilation components, such as the intake fan and exhaust fan, can impact the overall effectiveness of the carbon filter. A well-functioning intake fan helps bring in fresh air, balance the airflow, and prevent negative pressure inside the grow room. An efficient exhaust fan ensures proper air extraction through the carbon filter, maximizing odor control. Choosing reliable and correctly sized fans that work in synergy with the carbon filter is crucial for optimal performance.
Does it need to be turned on your carbon filter all the time?
Yes, keeping your carbon filter running all the time for continuous odor control in your grow tent is typically recommended. Whether to run your carbon filter all the time or selectively depends on factors like odor control, energy consumption, noise level, and plant stage.
If odor control is your top priority, running the filter continuously is recommended to ensure immediate filtration and expulsion of any odors within the grow space, maintaining an odor-free environment.
However, this continuous operation can lead to increased energy consumption, so if minimizing energy usage is a concern, you can choose to run the filter selectively, such as during the flowering stage when stronger odors are produced.
Carbon filters are often connected to exhaust fans that can generate noise, so running the filter during specific times or using a fan speed controller can help reduce noise levels.
Lastly, considering the growth stage of your plants is important. During the vegetative stage, plants typically produce fewer odors, making continuous filter operation less essential. However, during the flowering stage, when odor production increases, it is advisable to have the filter running consistently.
How long do carbon filters last?
Carbon filters last a maximum of 24 months. However, their lifespan can also vary depending on various factors such as the setup location and the region installation.
Generally, a good activated carbon air filter can last for about six months when used indoors and may need to be replaced once every year. However, when used outdoors, the lifespan of carbon filters can be shorter due to exposure to environmental elements.
In regions with warm and arid climates, carbon filters can have a maximum lifespan of 24 months, whereas in colder and more humid locations, their longevity decreases to 12-24 months. On average, activated carbon filters typically last around one year. However, replacing carbon filters every 6 to 12 months is generally recommended to ensure optimal performance.
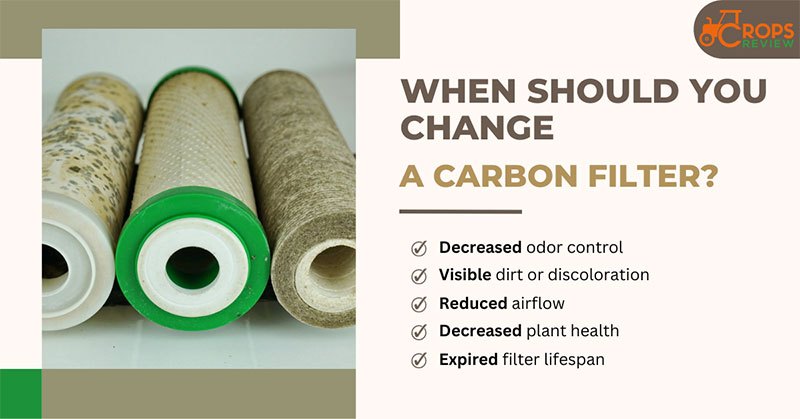
When should you change a carbon filter?
The top 5 signs that indicate you should change a carbon filter are decreased odor control, visible dirt, reduced airflow, plant stress, and filter lifespan.
- Decreased odor control: If the carbon filter is no longer effectively removing odors from the air, it may be time for a replacement.
- Visible dirt or discoloration: Inspect the filter regularly, and if you see a significant build-up of dust, debris, or discoloration, it clearly indicates that it needs to be replaced.
- Reduced airflow: If you experience a decrease in the airflow coming from your ventilation system or air purifier, it could be a sign that the carbon filter is clogged and needs replacement.
- Decreased plant health: If your plants are showing signs of stress, such as wilting leaves or stunted growth, and all other factors have been ruled out, it’s possible that an ineffective carbon filter is not properly removing contaminants from the air.
- Expired filter lifespan: It is important to keep track of the recommended lifespan depending on the specific type and brand of carbon filter. If the filter has reached its maximum recommended usage time, it should be replaced to maintain optimal performance.
How to build your own carbon filter?
To build your own carbon filter, collect the materials needed for the process and follow the step-by-step guide below.
Materials needed:
- Two mesh pencil holders
- Activated carbon (granular or rock form)
- Pre-filter components
- Tools (e.g., drill, tape) for assembly and securing components.
Step-by-step Guide:
- Obtain two mesh pencil holders, which will serve as the framework for your DIY carbon filter.
- Ensure proper permeability by creating holes or using mesh screens on both pencil holders.
- Fill the inner pencil holder with activated carbon, which can be purchased from stores or obtained from carbon rocks.
- Place a pre-filter on top of the activated carbon to prevent larger particles from entering the filter.
- Securely assemble the two pencil holders together, ensuring a tight fit and sealing any gaps to maintain airflow through the carbon filter.
Is a DIY grow tent carbon filter worth it?
A DIY grow tent carbon filter is worth it at being cost-effective, but it may need to match the performance and longevity of a commercial filter. It depends on your specific needs and capabilities.
One advantage of a DIY carbon filter is its cost-effectiveness, as building one yourself is generally more affordable. Additionally, DIY filters offer customizability, allowing you to tailor them to your needs. The materials needed for a DIY filter are often readily available, making them easily accessible.
However, DIY filters may have less effectiveness than commercial products and may provide a different level of filtration and air purification. Commercial filters are typically more durable and come with warranties and customer support, while DIY filters may need more.
Choosing a DIY carbon filter depends on budget, skill level, and specific requirements.
How do you choose the best carbon filter for your grow tent?
When choosing the best carbon filter for your grow tent, there are several criteria to consider:
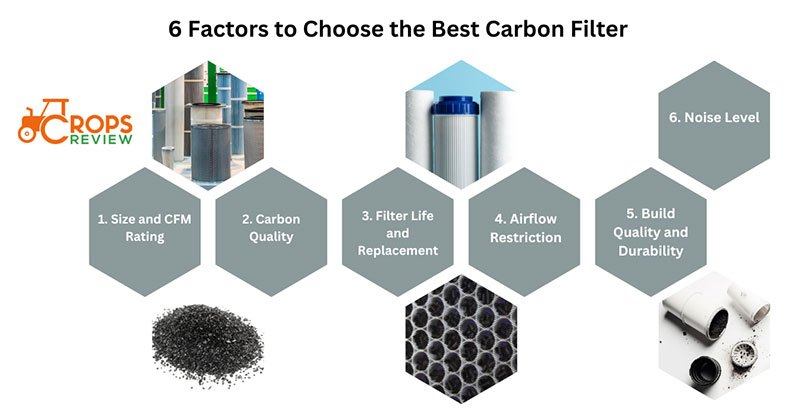
Size and CFM Rating: Ensure that your carbon filter is appropriately sized for your grow tent. Consider the CFM (cubic feet per minute) rating, which indicates the filter’s airflow capacity. Match the CFM rating with your ventilation system to ensure proper air exchange.
Carbon Quality: Look for activated carbon filters that use high-quality carbon. The carbon should have a high absorption capacity and be designed explicitly for odor and pollutant removal.
Filter Life and Replacement: Consider the estimated lifespan of the carbon filter and how frequently it needs replacement. Longer-lasting filters can save you money in the long run. Some filters come with indicators or timers to remind you when it’s time for a replacement.
Airflow Restriction: Check the pressure drop or airflow restriction caused by the carbon filter. A filter with low airflow restriction allows your ventilation system to operate more efficiently, preventing strain on fans and maximizing airflow.
Build Quality and Durability: Look for carbon filters made from durable materials such as steel for the outer shell to withstand the conditions inside a grow tent. The filter should be sturdy, resistant to moisture, and capable of handling high temperatures without deteriorating.
Noise Level: Consider the noise level generated by the carbon filter. Some filters may produce noticeable noise due to fan operation. Opt for filters with built-in noise reduction features or quiet operation if noise is a concern. The ideal carbon filter noise level is 50 dB or lower.
What are the safety factors for carbon filters?
When using carbon filters, it is important to consider safety factors such as fire hazards, carbon dust emissions, limitations in contaminant removal, and proper filter maintenance.
Carbon filters can pose a fire hazard if not properly ventilated or used near flammable substances. Carbon filters may release carbon dust, although it is generally not harmful. Understanding the limitations of the filter’s contaminant removal capabilities is crucial, as heavy metals may not be effectively removed.
Regular maintenance and replacement of filters are necessary to ensure optimal performance and mitigate potential safety risks.
How do you maintain your carbon filter?
There are 4 tips and guidelines to follow to maintain a carbon filter.
- Regular Cleaning: For carbon air filters, you can wipe off debris from the outer surface area using a dry sponge or your hand. This helps remove any accumulated dust or particles that may hinder the filter’s performance.
- Washing Carbon Filters: Some carbon filters can be washed, but ensuring they are completely dried before reuse is essential. Washing can help remove dirt and impurities trapped in the filter. However, not all carbon filters are washable, so checking the manufacturer’s instructions before washing them is crucial.
- Replacement Schedule: Carbon filters have a certain lifespan, and replacing them at the recommended intervals is important. The replacement frequency typically depends on usage intensity and the specific application. It is generally advised to replace carbon filters every 3 to 4 months for ventilation systems, but this may vary. Consult the manufacturer’s guidelines for your specific filter.
- Indicator Lights: Some carbon filter models come with indicator lights that blink when it’s time for cleaning or replacement. Pay attention to these indicators and take appropriate action accordingly.