We all want the best for our gardens and lawns, right?
We want it to look attractive and make us feel connected with nature. It’s through this that we can relieve ourselves from the pressure and stress of daily life. But how can we do that? Well, one way is to plant ranunculus.
Read this article to understand how to plant ranunculus at a glance.
Table of Contents
What do you need to get started?
1. The perfect place

The first thing you’re going to need to consider is choosing the ideal location for your ranunculus.
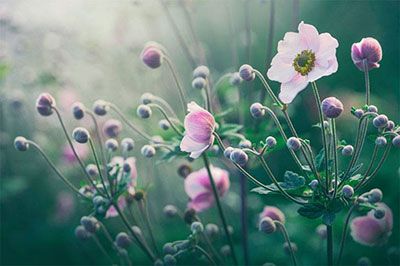
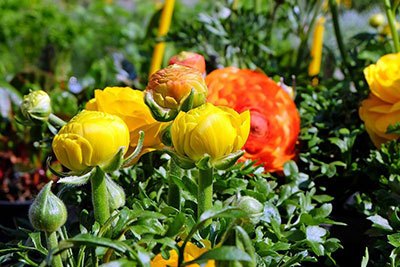
These plants prefer sunny places because they need a lot of sunlight to help them develop their bright and vibrant-colored petals. It’s best if you choose a location that exposes the ranunculus directly to sunlight.
However, it’s also important that they also receive a bit of shade, such as putting them near a tree. If the climate in your place is cold, you might want to keep the tubers inside a storage box or room so that they won’t freeze.
2. Right kind of soil
Another thing you need to have is the right kind of soil. These ranunculus prefer sandy soil that is not very damp.
These plants would grow beautifully if you ensure that the soil can easily drain water and moisture because ranunculus easily absorbs water which then causes them to get drowned easily.
The pH level of the soil should also be slightly acidic. It should be between pH levels of 6 and 6.5. You can use lime if the pH level is below those figures. On the other hand, you can also put aluminum sulfate to decrease your soil’s pH level.
3. Seeds and tubers
There are two options for planting ranunculus. You can either have seeds or tubers. If you have a seed, see to it that it doesn’t have any defects or irregularities in shape. The color should also be consistent among its group.
On the other hand, you might also want to try using tubers, which are also called bulbs.
These are more popularly used compared to the seeds because they are easier to plant and maintain throughout their growth. Just be sure that the “spider’s legs,” as most gardeners call them, are faced downward when planting.
4. Sufficient water
It is also important that you supply your ranunculus with sufficient water. And what we mean by sufficient water is you should never give it too much.
The recommended amount of water ranunculus sprouting seeds needs 0.5 to 1 liter per day. They don’t need too much water because they quickly drown.
Ranunculus also thrives in not-so-damp soil, which is why they don’t need too much moisture. You can distribute this amount of water throughout the day.
However, it’s best if you give 30% of that water amount at sunrise, then the other 40% at noon or 1:00 PM, and the last remaining 30% before sunset.
Knowing the process
Step #1: Plant it during the fall and spring seasons
You can plant ranunculus during the fall and spring seasons because these are the times of the year when the weather is just mild. The climate is not too cold or too hot. It’s the perfect time for any plant’s growth, especially with ranunculus.
If you plan on planting it during the Fall months, be sure that the winter temperature in your place doesn’t go below 7 degrees Celsius.
If it doesn’t, then you won’t have any problem leaving them outdoors throughout the winter. But if you have extremely cold winter months, that’s the time you need to transfer your ranunculus indoors.
You can place them on a low tunnel or hoop house.
Step #2: Unpack and soak
The next thing you need to do is to unpack the ranunculus corms and soak them in water for 11 to 13 hours. Make sure that the water is at room temperature. This will help oxygenate the corms.
After this, you have the choice to either plant it immediately or let it undergo the process of resprouting, which is more recommended.
Pre-sprouting is helpful in the plant’s growth as this gives you a head start in the blooming of flowers. When you pre-sprout your corms, they’ll bloom flowers one to two weeks in advance.
Step #3: Presprout
To pre-sprout your corm, fill your seed tray with damp potting soil. Don’t fill the entire tray. Filling it halfway will do. Place the soaked corms on it and cover them with another layer of soil.
Leave them there for 10 to 15 days. It’s best if you place them in a cool and safe place. Check them often. If you see any signs of rot and mold, immediately remove it.
Step #4: Plant your pre-sprouted ranunculus
Once the 10 to 15 days are done, you can then remove them from the tray. Your ranunculus would then have grown to about twice its original size.
White rootlets would also have formed. Plant them in slightly moist and sandy soil. It’s best if you place them 2 to 3 inches deep into the soil.
Step #5: Cover during the winter months
When the winter months come, it’s best if you cover them with any frost cloth so that they won’t freeze.
This is very important, especially if the temperature goes below zero degrees Celsius. This will help insulate the plant and absorb enough heat to ensure that its growing roots won’t freeze and rot when the temperature warms up again.
Conclusion
With all of this being said, you can see that planting ranunculus isn’t that hard. You just need to prepare the right things you’re going to need in advance. After that, you can simply follow the simple tips and techniques mentioned in the article.
When you do, you’ll surely be growing fantastic and blooming ranunculus in no time.
If you have any questions or thoughts regarding the article, feel free to voice them in the comment section below.