When it comes to installing fencing wire, the process can be quite intimidating. It requires a lot of hard work and material that needs to be worked with to last throughout different weather conditions.
Thankfully, we’re here to provide you with all the necessary information on how you should go about tackling this project correctly! This step-by-step guide will lay out all of the essential elements needed and provide plenty of easy-to-follow instructions.
So by following along and having patience, you’ll get through this installation safely and effectively! Get started now and have your fence wired up properly before winter sets in again.
Take away key points:
- There are multiple steps to follow and install your fences correctly
- Ensure you have all the necessary equipment, materials, and tools to finish this process quickly
- Finally, ask for help if you cannot manage to finish it alone
Table of Contents
- Installing a welded wire fence line properly: All you must know
- FAQs
- Does fence wire go on inside or outside of the post?
- How do you secure a wire fence to the ground?
- Is it hard to install a wire fence?
- How to build a barbed wire fence with T posts?
- How to install a field fence with T posts?
- How to install welded wire fence with T posts?
- How to install woven wire fence with T posts?
- Which side of t post does the wire go on?
- Final words
Installing a welded wire fence line properly: All you must know
If you need to know more about how to install a proper welded wire fence line, where to start, and the process to follow, refer to our guidelines below. We will explain the procedure in detail.
Pre-step: Choosing the fence posts
It seems you’re interested in setting up a welded wire fence, which is a relatively easy task. All you need to do is gather the necessary materials and ask some friends for assistance.
First, you’ll need to decide on the type of fence post you want to use. You have two options: wooden fence posts or metal posts. While a wooden fence post is a more conventional choice for other fences, it may not match the look of a welded wire fence and requires more maintenance.
On the other hand, a metal post matches better with a welded wire fence, lasts longer, and requires less upkeep. Ultimately, either option will work with your welded wire fence.
Once you’ve chosen your fence posts, you need to determine the height of your fence. Typically, fence posts are buried at least two feet deep in the ground, and the height of the fence should be added to that. If you opt for wooden posts, eight-foot fence posts work well, as you can always cut them down to the desired height.
Step 1: Gathering necessary materials
If you have all the materials required, setting up a welded wire fence can be a straightforward process. To make it easier for you, we have compiled a list of materials you’ll need:
– Fence posts (either metal posts or wood fence posts)
– Shovel
– Gravel
– Bags of concrete
– String
– Wooden stakes
– Measuring tape
– Scissors
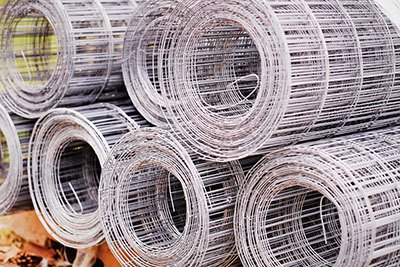
– Welded wire
– Level
– Staples
– Stapler
– Baling wire or metal ties
– Gate materials (2x4s for a wood gate, or a metal gate)
Note that some of these materials may vary based on your choice of fence posts. For example, if you decide to use wood posts, you will use a stapler instead of metal ties or baling wire, and vice versa.
Step 2: Measuring your welded wire fence
To make the welded wire fence building process smoother, it is crucial to measure the area where the fence will be installed.
Start by selecting a point and measuring from there, marking each corner with a stake so you can measure again after adding additional fence posts.
After marking out all four corner post spots, measure diagonally to ensure the wire fencing area is accurately squared. Or, if you want to build a rectangular fence, make sure it looks like one.
Adjust the stakes if necessary to achieve the correct angles for the welded wire panels. Tying strings to line posts to ensure they are straight is also helpful. Property owners should not forget to mark the spot for the gate, which is usually between two posts.
To determine the amount of wire fence needed, measure each side of the wire fencing and add up the total length. The next step is to divide it by the distance you prefer between fence posts, generally ranging from 7 to 10 feet for this wire fencing.
Knowing the number of fence posts is essential to prepare for the installation of welded wire rolls. Welded wire fence is sold in rolls ranging from 25 to 100 feet, with larger rolls being more cost-effective but more challenging to handle than smaller rolls.
Step 3: Dig holes for your fence post models

Having accurate measurements when installing fence posts is crucial. Keep in mind that fence posts must be embedded two feet deep into the ground post holes, plus the desired height of the fence post.
If you decide to dig deeper, you’ll need to compensate by using a longer fence post, depending on how high you want the fence to be. You can use either a shovel or a post-hole digger to dig holes for your fence post units.
Ensure that you follow your previously calculated measurements to get your fence post height right.
Step 4: Setting up the fence post
To prevent the fence post from being damaged by moisture, it is essential to place a layer of gravel in the hole of the fence post. It should be approximately six inches thick.
Since wood fence posts are vulnerable to rotting due to moisture, laying down gravel is crucial. Metal posts can also benefit from this because it provides more stable support.
Once you have added the gravel, position the fence post into its designated hole. Ensure it is leveled and maintains a ninety-degree angle to the ground. It is vital to have someone help you to avoid positioning the wire fence and line posts incorrectly.
With the post level, slowly add concrete into the hole to hold the wire fence post firmly and prevent moisture from ruining the post. Concrete is highly recommended when anchoring fence posts because it offers robust support and shields the post from moisture.
In addition, it prevents the fences from rotting wood, water, moisture, and other damage that might affect your fences. The corners and all other posts can rot quickly if you don’t pay much attention to your wood posts. Repeat these steps for all fence posts needed for the welded wire fence.
When all fence posts have been implanted, allow them to set for a few days to ensure they’re entirely dry and stable. Frequently check the first twenty-four hours to ensure the post remains in place. Once the cement has set, and the fence post is stable, you can proceed to the next step.
Step 5: Attaching the welded wire fence
Attaching the welded wire to create the fence is the next step after setting the fence posts. Use a stapler if you have a wooden fence post or baling wire/metal ties if you’re using metal posts.
Start pulling at metal or wood corners and roll out the welded wire. It’s helpful to have someone hold the fences so you can secure them to the corner post. Stretch the fence as far as you can to make sure it’s taught and secure.
When you get to a corner post, stretch the wire around it and continue as before. If you run out of material, join the end of the first roll to the last post it reaches, and start a new roll on the same post.
Ensure the fencing stays level throughout the attachment process, and stop every other fence post to check the levelness. Use wire clippers later to remove the excess wire. This way you will attach wire fence to wood post/metal post without any issues, for keeping animals contained inside the property.
Step 6: Adding a gate
Once the welded wire for fencing is in place, it’s time to focus on the gate. Ideally, the gate should sit between two fence posts.
If you prefer a smaller gate, you must adjust the distance between the fence posts accordingly. Determine the width of your gate by subtracting an inch from each post, allowing it to swing open and closed.
Cut two 2x4s according to the measured width, subtracting the necessary inches from the gate. Next, assess the height of your gate, and cut another two 2x4s to fit between the top and bottom boards, creating a box shape.
Assemble the boards into the door shape, bolting the 2x4s together with four L brackets on each fence corner to ensure stability. Cut a board to the length of the top corner down to the opposite bottom corner at a 45-degree angle. Attach the board to the gate, thus forming the door of the gate.
Install the latches and hinges to the gate door, mark the fence posts, and place the gate door in position. Make sure it swings on both sides before securing it to the fence. If you prefer a metal gate, the same principles apply but ensure you have accurate metal measurements before purchasing the gate from a hardware store.
FAQs
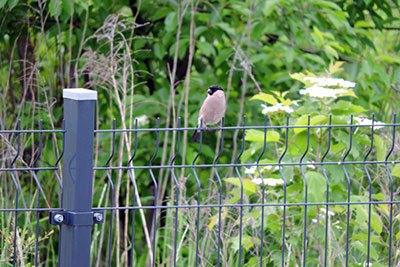
Does fence wire go on inside or outside of the post?
The fence wire goes inside the post. It should be installed on the inside part of the line post, and outside of the curves.
How do you secure a wire fence to the ground?
If you’re using a chain link fence, the procedure is the following:
– install the bottom rail
– use the tension wire to fortify the bottom of the chain link fence
– add the chain link stakes to the ground
– put a guard at the bottom of the fencing
– use a secure chain link fence from all around the system
Is it hard to install a wire fence?
No, generally, it is not hard to install wire fences. Wire fences are inexpensive and quick to install when you’re using metal posts driven into the ground. If you use wood posts set in holes, your wire fences will be sturdier.
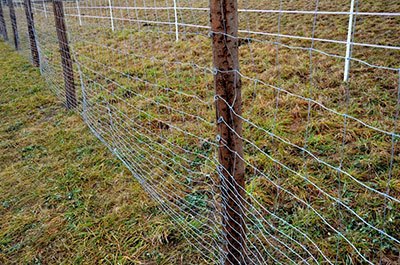
How to build a barbed wire fence with T posts?
Follow the steps below:
– Start by installing the T-posts at a distance of 15 to 20 feet apart.
– Fasten a section of barbed wire on your first corner T-post with a couple of fencing staples.
– Make sure to always use at least two of the U-shaped staples for attaching each wire to the T-post to prevent sagging of the wire.
– Extend the wire to the next T-post and attach it in the same manner to the post.
– Repeat this process for the remaining T-posts until the fence is complete.
How to install a field fence with T posts?
To install a field fence with T-posts, you need to follow these steps:
– Establish your corners
– Line up and space the posts
– Position the posts
– Drive the posts into the ground
– Attach the fence
Remember, it’s recommended to use a 5 to 1 ratio of steel T-posts to treated wood posts for superior stability. Make sure your posts are at least two feet in the ground for maximum security.
How to install welded wire fence with T posts?
Building a T-post fence requires these steps:
– Begin by measuring and laying out the fence posts. Place the T posts at intervals of 8-10 feet.
– Dig holes for the fence posts and insert the T posts into the holes.
– Pour concrete into the holes to stabilize the posts. The concrete should be at least 2 feet below the ground.
– Once the concrete has been set, attach the welded wire fence to the T posts. Roll out the fencing against the posts and staple it down.
– Ensure that the fencing is completely level, and tension it tightly between posts using a fence stretcher or come-along.
How to install woven wire fence with T posts?
To install a woven wire fence with T posts, you will need to follow a few basic steps:
– Begin by planning out your installation and layout, including establishing your corners and spacing the posts.
– Position your posts and drive them into the ground using a post driver or similar tool.
– Use wire clips to attach the wire fence to the T posts, starting with the lowest strand first and working your way up.
– Install corner post braces at the ends of your fence and every 30-50 feet throughout its length.
Which side of t post does the wire go on?
The wire goes on the side that the T-post studs face. It refers to the side of the fence that will endure the most pressure.
Final words
Fence installation is a process that may seem difficult but could be easier with the right knowledge and materials.
The complex nature of it means that people should take their time and focus on following the steps correctly to ensure the wire of the fence is installed properly.
Having the necessary tools when starting this task will help you out significantly and if for any reason, you find yourself struggling then do not hesitate to reach out for assistance.
Finally, you will have a beautiful gate that not only provides an aesthetically pleasing sight but also a secure enclosure as well.