A 3-point hitch is the essential tractor part.
In addition, the unit helps you attach various tractor implements and other farm equipment, such as a box blade, spreader, brush hog, and other different machinery.
Still, to correctly use and unlock all tractors’ potential, you need to attach and adjust the 3-point hitch properly.
So, how do you connect tractor implements? Our little tips & tricks will guide you through the process.
Table of Contents
What are tractor implements?
In agriculture, a tractor implement is an agricultural machine required to perform the mechanized process and operate in agricultural production.
If a tractor implement has its engine and transmission for movement and driving the active components, the implement is called self-propelled.
Still, if the implement requires a tractor’s PTO shaft to transmit the engine power and make the attachment work, then the implement is a PTO one.
Implements can be mounted typically on the front or rear end of the tractor, using various means, such as a drawbar (rear), a 3-point hitch (rear), or lift arms (front).
And tractor implements have different purposes, including farming operations, yet other applications, such as digging, grading, snow blowing, etc.
So, what are the convenient hitches & the power application?
The tractor engine’s power transmits to the implement or other equipment to do the intended work.
So, tractors can either use a hitch system or a drawbar if the implement requires towing. Of course, tractors use PTO systems for stationary implements or combine the two.
Types of the implement connection
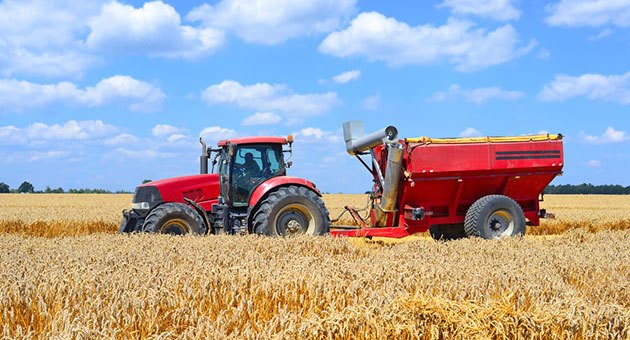
1. Drawbars
You can usually connect plows & other different tillage equipment to your tractor via a drawbar.
A drawbar is a steel bar connected to your tractor, where the hitch of the attachment connects with a clevis, loop, or pin.
Thus, you can freely attach or remove the implement and use your tractor for other operations and projects daily.
Still, if your tractor was equipped, you could set it at the center or the center’s offset to permit your machine to run outside the implement’s path.
The drawbar required the implement to have its operating equipment, such as wheels.
Thus, if you used a plow, harrow, or chisel cultivator, you also needed a lifting mechanism to raise it off the ground while transporting.
Still, the drawbar included a risk of rollover depending on the attaching points of the tractive torque and their position.
So, specific tractors were prone to roll back due to shortened wheelbases.
Also, the connection between the tractor and implement often had a particular slack leading to complete wear and tear of the machines and difficult starts.
A drawbar was correct for its plain design, thanks to the implements’ existing running equipment.
Still, with new mechanical advantages, new equipment and machines replaced the drawbar.
Yet, even nowadays, depending on the tractor model and its purpose, the drawbar is one of the most common ways of attaching farm equipment to your tractor.
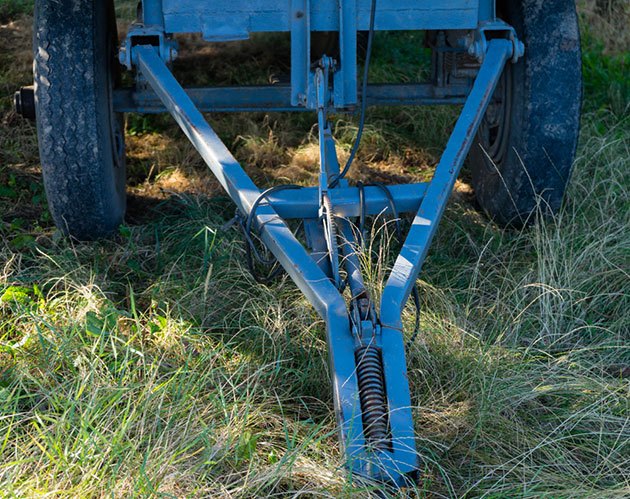
2. Three-point and quick hitch
As you have seen, the drawbar connecting mechanism was the best one until Harry Fergusson created a three-point hitch.
Therefore, the three-point hitch became a revolutionary method of connecting tractor attachments.
All attachments connected via the 3-point hitch can raise or lower with hydraulics and a control lever.
Therefore, tractors will ultimately support the implements attached via the 3-point hitch.
Yet, there’s an additional way of joining equipment to the tractor – a quick hitch with its position attached to the 3-point hitch.
The quick hitch is ideal for connecting an implement quicker and keeping one safe while hooking the attachment to the 3-point hitch.
As the 3-point hitch marked a new era in tractors and other farm machines, various manufacturers developed new hooking systems to improve the hitching mechanism.
So, nowadays, you can find the so-called “two-point fast hitch or John Deere’s power lift“. So, the 3-point hitch became the agricultural standard.
Almost all tractors contain the 3-point hitch, or at least its derivation.
Hence, the 3-point hitch allows the attachment to function as a part of the tractor, hooked via a fixed mount.
Still, there were specific issues previously, when the attachment hit obstacles, the tractor flipped over, or the link broke.
So, Ferguson wanted to create a system of two lower & one upper lift arm linked to the hydraulic lifting ram.
Further, the ram was linked with the upper of these three links, so when the machines met an obstacle, the tractor’s hydraulics lifted the attachments until they overcame it.
And recently, the Bobcat’s front loader link has been popular with modern tractors, allowing quick-connect attachments for the front-end loaders.
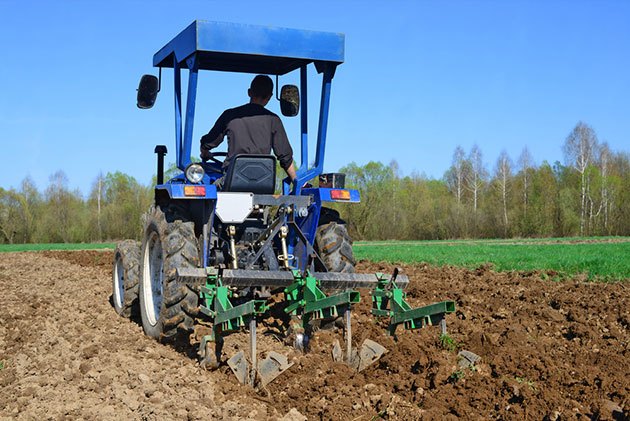
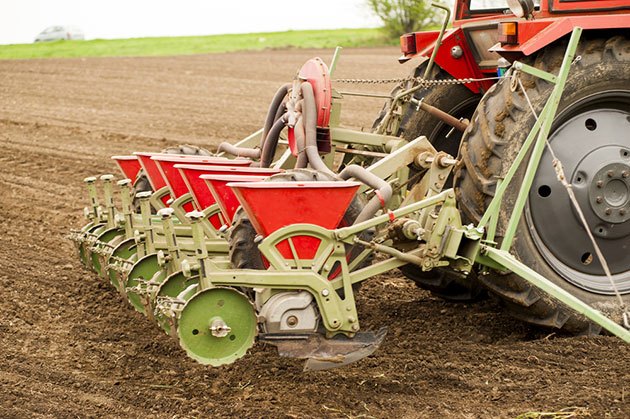
3. Fixed mounts
However, certain tractor manufacturers invented linking systems and matching equipment that you can directly mount on the tractor.
These machines include:
- corn planters
- corn pickers
- row-crop cultivators
- belly mowers
- front-end loaders.
In most cases, the systems were unique, corresponding only to the same brands, so, for instance, a Ford tractor could not match the John Deere implement, and vice versa.
Another drawback was that the mounting required much of your time and hard work, so the implements were only semi-permanently attached with bolts or different mounting hardware.
In most cases, it was also highly impractical to remove the attachments and re-install them again for other purposes.
So, farmers used their machinery only for a single purpose for an extended period.
Thus, they mounted the attachments at the season’s beginning and removed them when the season ended.
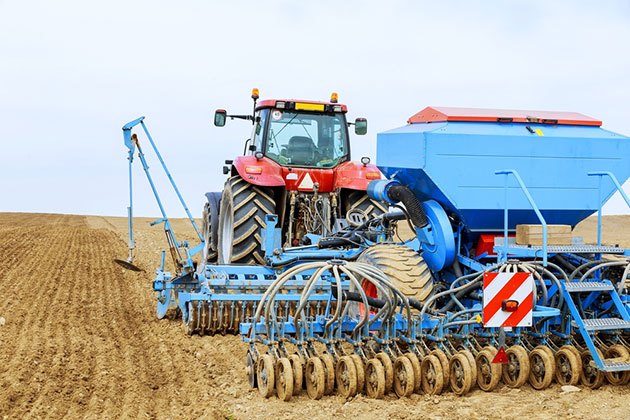
4. Power take-off systems (PTO) and hydraulics
In addition to towing the implements and improving the tractive power and energy through their wheels, most tractor models have a specific system transmitting the power to machines, including mower, swather, or baler.
The implements require their power source if they don’t function by pulling them over or through the ground.
And that’s where the PTO shaft jumps in.
A tractor PTO shaft is a tool used to transmit and direct the engine power to the mechanical operations of the attached equipment.
In the past, the earliest tractor models used cables or belts wrapped around the flywheels or separate belt pulley to empower the stationary implements, including stationary balers, silage blowers, buzz saws, and threshing machines, etc.
Since it was highly impractical to work with cables or belts between the two machines, the work went the following way: the tractor had to be relocated at each turn, and the power system re-used or moving of the tractor work was brought to the implement.
So, the tractor PTO shaft system completely changed the tractor system, as the power take-off shaft provides rotary power to the machines, whether pulled or stationary.
The shaft is located at the tractor’s rear position, and you can hook it to the implement connected via the 3-point hitch or drawbar.
The tractor PTO shaft eliminates additional power sources, manual power, and other tools, so they are never seen in the agricultural equipment business.
But, as the modernization of the machines continues, you can also purchase a front PTO shaft when buying a brand-new tractor.
And with the impact of modern technology, you can even come across various tractor models with electrical power or external hydraulic fluid to the towing equipment, either via wires or hoses.
How to adjust a 3-point hitch on a tractor?
To correctly attach and adjust a 3-point hitch on your tractor, you need to modify two main parts: the top link, and the stabilizers.
A pro tip: you must adjust your 3-point hitch whenever you need to change implements.
Regarding the 3-point hitch adjustment link, the top link controls the angle you connect the implement according to the ground. Thus, you can twist or change the shaft of the top link.
You can also change the length and size of the top link.
In addition, you will need to adjust the stabilizers as well.
Their primary purpose is to protect the implement and prevent it from swaying during an operating process.
Extra tip: You can find them next to lift arms.
So, to adjust the stabilizers, you need to:
- pull a pin
- put the pin where you want
- turn the turnbuckles until each one is in the right place
- make them tight enough
- tighten the jam nut that was loosened
- turn them down
- tighten up with the wrench
To remove the stabilizers and the whole construction, you have to go in reverse:
- loosen the jam nut
- relax them until you get the lower link arms around the pins, and then
- you’re back out from around the implement
- you can disconnect the tractor implement
But, once you finish with one side, you can go to the other and use the bar to hook the implement properly.
Why are stabilizers crucial?
As you have seen, the stabilizers are called turnbuckles & they run from the tractor axle to the 3-point lower arms.
If you don’t deal with them, the attachment will flip back and forth.
Some implements get into tractor tires, and you should avoid that.
However, if you don’t adjust the stabilizers, the tires will be under pressure and damaged without a warranty.
So, my suggestion is to focus on stabilizers and adjustments to save money.
How to link a tractor implement on a 3-point hitch?
If you have a new tractor, learning how to link an implement to the 3-point hitch properly might be challenging, although you might think it will be quick.
However, as practice makes it perfect, you will be better.
Still, bear in mind that some farmers do agricultural tasks their whole life and still have difficulties with a link between a 3-point implement and the tractor.
A relatively quick procedure
Simply put, all you have to do is align your tractor so that the lower link arms go around the pins of the implement and swing-out.
So, if you want to link a tiller to your 3-point hitch, you need to align the tractor with the implement to link and attach all parts correctly.
A more challenging process
Firstly, you need to inspect the rear end of the tractor.
So, please take a close look at its back end. You will find that one or other lower link arms can adjust up and down to fit your needs.
Also, you might find the so-called turnbuckle, a unit allowing lift arms to go up and down.
They are helpful if the implement is not in the exact alignment as your tractor.
Still, you can easily adjust the lift arms since you can move them up and down. In addition, the lift arm is adjustable to link the implement to the right height.
You can start from the left side and put the left lift arm on first if your right lift arm is adjustable, or vice versa. So, examine the lift system as well.
Still, you will completely align the implement with your tractor’s left side. Then, you can swing the left lift arm and adjust it to the correct height.
Once you find the proper size, you can put it on and then attach it to the lift pin to keep the lift arm on.
The climax is to back up to where the pin on the right side is in line with the lower link arm on the same side.
If this is not the case, you will have to get your tractor and implement it in line again.
You need to ensure the tractor is in line with the hole.
And, if you cannot move the implement, a tiller, for instance, as the machine is too heavy, you can use your tractor to push it up and make it in line with the tractor.
And once you push it correctly, you can continue the mounting.
Additional secure tips for attachment adjustment
Once you position the tractor to line up the attachment, you must attach the lower lift arms to the right side.
Next, you can attach the top link with the link pin so that the link will be secure for the ride.
Next is to adjust the top link to meet the correct length and go back to the hole of the implement you’re attaching your tractor to.
After, you will slip the pin through the top link and the implement. Once you hook all the parts correctly, you can lift your implements from the ground.
The final step: safety instructions
The final step is to attach and secure the PTO shaft. Whenever you hook your PTO on the 3-point hitch, please turn your tractor off!
So, respect the safety instructions to avoid damage and keep your health safe.
You will notice a collar to pull back and slide on the shaft until it’s past in the shaft’s groove.
There are a series of ball-bearing inside the shaft. Therefore, slide the collar back to go out and slide past the groove on the shaft of the tractor.
Finally, when you pull it back and release the collar, they can snap into place, and then you can ensure a secure link with the PTO.
So, you will be ready to go without pressure or error.
Still, you can freely watch various videos to attach the 3-point hitch and the attachment correctly, without pushing and pulling. But, the primary tips will focus on the following acts:
- aligning the implement pins and the end of the lift arms
- connecting and securing the implement’s top link and the lift arms
- adjusting the lift arm angle, stabilizers, and the top link length
- connecting PTO shafts – only if necessary.
And, if you follow all the tips thoroughly, you cannot find an error in lifting the attachment from the ground.
Potential issues with the 3-point hitches and implements
Specific implements might be hazardous to your tractor, as they are too heavy, cumbersome, awkward, or cannot be correctly mounted.
Additionally, beware of the 3-point hitches on older machines with inconstant and obsolete operating functions.
However, you need to check the specifications to see whether a box blade, brush hog, tiller, or other tractor implements can hook the tractor system correctly.
Moreover, some will require extendable lower link arms to extend the lower links. That will make progress delayed and more complicated, and I hope this won’t be an issue.
Still, if you need to use these arms, remember to stay an inch or so away and then extend the arms.
The common issues with the hitch might include:
- the hitch can’t raise; it drifts and falls
- the hitch cannot raise at all
- the hitch stays up and won’t go down
- the trap goes down too slowly
So, to fix these problems, you need a supply of hand tools and extra hitch hardware with a toolbox mounted on one side of the tractor’s fenders to keep them at hand.
Final thoughts
I hope the tips helped you in the mounting procedure & that it’s a bit clearer how to switch from a box blade to a tiller, trailer, brush hog, or any other tractor attachment.
In addition, you must examine the general location of the mounting parts – the arm, pin, bar, lever, etc., to successfully switch between the implements and use the right one properly.
If you still have issues attaching machinery to your tractor, you can watch videos with tractor experts and the step-by-step procedures.
Yet, we have covered all the steps together on how to connect tractor implements, so it’s up to you to try and connect all the implements.
And let me know once you finish the process.